How Does NGN Partial-Credit Scoring Actually Work?
Understand NGN partial-credit scoring with worked SATA, Select N, matrix, bowtie and rationale examples. Learn how unsupported selections lose points and how to review errors.
1. Quick Answer: How Does NGN Partial-Credit Scoring Work?
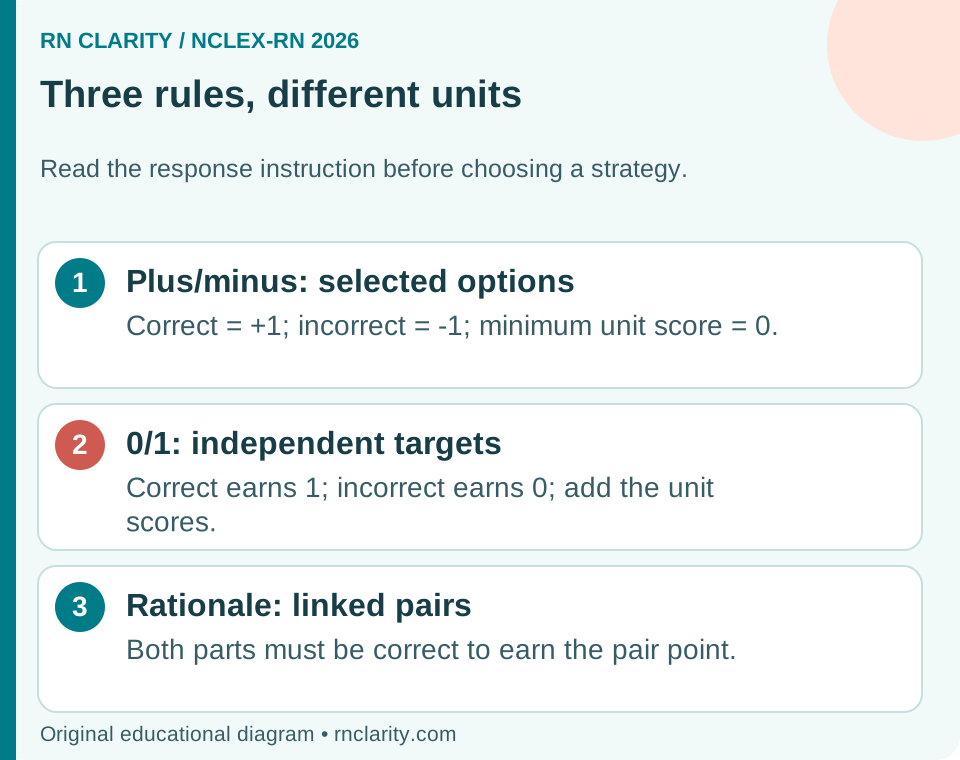
NCLEX partial credit uses three scoring approaches: plus/minus, 0/1 and rationale scoring. With plus/minus, a selected correct option adds a point and a selected incorrect option subtracts a point; the applicable scoring unit cannot finish below zero. With 0/1, correct response units earn points and incorrect ones earn none, without subtraction. With rationale scoring, linked responses must be correct together to earn credit for their relationship.
Those differences change how you should approach an item. An unsupported extra SATA selection can cancel credit from a correct selection. However, a “Select three” instruction is not an invitation to choose only the two answers you feel certain about. Complete the required response using your best supported reasoning. The safest preparation is to understand both the clinical task and the selection instruction.
| Rule | What earns credit? | What happens to an incorrect selection? | Teaching example |
|---|---|---|---|
| Plus/minus | Selected correct options | Subtracts within the applicable scoring unit, with a zero floor | Three correct selections and one incorrect selection earn 2 points |
| 0/1 | Correct independent response units | Earns zero for that unit; does not subtract earned points | Three correct rows out of four earn 3 points |
| Rationale | A correctly completed linked pair | An incorrect part prevents credit for that pair | Correct action plus correct reason earns the pair’s point |
Start here: Read sections 4–7 for SATA arithmetic, sections 11–15 for matrices and 0/1 examples, and sections 16–18 for linked rationale examples. Section 23 gives a short practice set with answers.
The official basis is the 2026 NCLEX-RN Test Plan, scoring section and NCSBN’s current scoring-model explanation. Every question and calculation in this guide is an original teaching example, not a recalled examination item. Study suggestions are coaching, not an official NCSBN guessing policy or a prediction of your result.
2. Five Terms That Make the Rules Easier to Follow
A key is a response designated as correct for the item. A distractor is an incorrect option. A response unit is the part being scored: perhaps a selected option, a matrix row or a linked pair. The maximum score is the credit available from that item’s key and scoring structure. A zero floor means that a negative calculation becomes zero for the relevant unit.
Suppose a SATA exercise lists six options and has three keys. Six is the number of available choices; three is the maximum point value in that simple plus/minus example. Selecting five options does not create five possible correct points. You cannot determine the maximum just by counting every checkbox on the screen.
Similarly, a sentence with two drop-down menus does not necessarily have two independently scored points. If the item tests one linked relationship, those selections can form one scorable pair. Conversely, a four-row matrix multiple-choice item can provide four independently scored units. The number of visible boxes and the number of scored units are different quantities.
For practice, write the unit beside your calculation before adding numbers. “One SATA item” and “one matrix column” are useful labels because they tell you where a deduction or zero floor belongs. Many arithmetic mistakes come from applying a correct rule to the wrong unit.
You do not need specialist psychometric vocabulary to answer safely. You need enough structure to avoid three errors: counting distractors as available credit, treating every blank as independent, and allowing a negative subtotal to cancel points outside the unit where it belongs.
3. Which Item Types Use Which Rule?
NCSBN’s July 2026 scoring FAQ identifies the following mappings. This table summarizes the named formats rather than inventing a scoring rule for every possible screen design.
| Format named by NCSBN | Rule | Important distinction |
|---|---|---|
| Single-response items | 0/1 | One correct response earns the available point |
| Matrix multiple choice | 0/1 | Rows are independent |
| Multiple response Select N | 0/1 | The requested selection count is constrained |
| Drop-down cloze and drop-down table | 0/1 | Ordinary independent targets accumulate credit |
| Bowtie | 0/1 | Five correct targets provide a maximum of five points |
| Multiple response SATA | Plus/minus | Extra incorrect selections can subtract |
| Matrix multiple response and multiple response grouping | Plus/minus | Columns or groups/rows are scored independently |
| Paired information requiring justification | Rationale | Both parts of a scored pair must be correct |
A case study is the setting in which items appear; it is not itself a fourth scoring formula. A trend chart is information to interpret; its presence alone does not tell you how selections are scored. “NGN” is also not shorthand for “every answer is minus one when wrong.”
Read the response instructions each time. A grid allowing one answer per row differs from a grid allowing several selections in a column. An ordinary drop-down cloze differs conceptually from a linked rationale response. Similar-looking controls can represent different tasks.
Go deeper: Connect these formats to the reasoning they assess in the clinical judgment and NGN guide and NCLEX Hub clinical judgment overview.
4. The Plus/Minus Formula, Step by Step
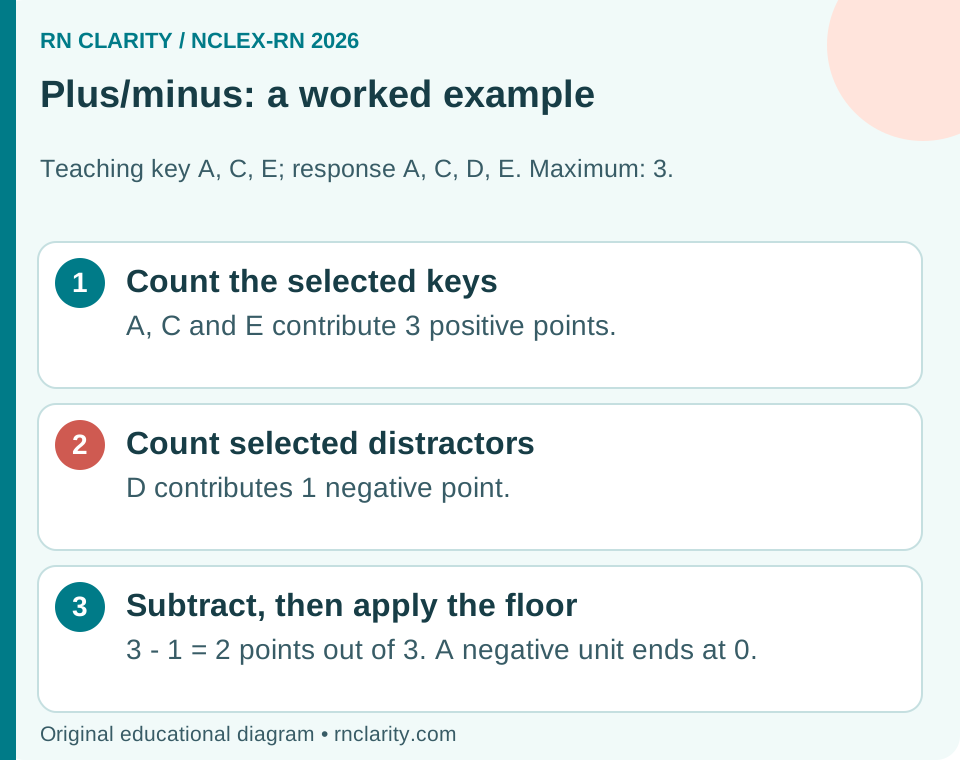
For a straightforward SATA item, the teaching calculation is score = max(0, C − W), where C is the number of correct options selected and W is the number of incorrect options selected. The notation “max” means use the larger of zero and the calculated difference. It expresses the floor; it does not award bonus credit.
Use four steps. First, identify the key in the answer review. Second, count the keys you selected. Third, count the distractors you selected. Fourth, subtract and apply the zero floor. Compare the final score with the number of keys available in that item, rather than the total number of choices.
Consider six options with a key of A, C and E. Your response is A, B, C. A and C contribute two positive points. B contributes one negative point. E was correct but unselected, so it contributes no earned point. The result is 2 − 1 = 1 out of 3.
Do not subtract a second time for missing E. Its absence already means you did not earn E’s point. Counting an omission as an additional negative point would change the rule into a different scoring model. Equally, do not award a point for leaving D or F unchecked: the simple formula counts selected correct and selected incorrect options.
This arithmetic is useful during review, when the key is known. During the examination you do not know C or W. Use the patient information to decide which responses belong; do not try to calculate hidden totals as you answer.
Source: NCSBN’s plus/minus definition and zero-floor explanation.
5. Worked SATA Example: One Extra Choice Can Cost a Point
Keep the same six-choice exercise and the same key: A, C and E. The table shows how different selections change the score. Letters keep the clinical content out of the way while you learn the arithmetic.
| Response selected | Correct selected | Incorrect selected | Calculation | Final score |
|---|---|---|---|---|
| A, C, E | 3 | 0 | 3 − 0 | 3/3 |
| A, C | 2 | 0 | 2 − 0 | 2/3 |
| A, B, C | 2 | 1 | 2 − 1 | 1/3 |
| A, B, C, E | 3 | 1 | 3 − 1 | 2/3 |
| A, B, C, D, E | 3 | 2 | 3 − 2 | 1/3 |
| A, B, C, D, E, F | 3 | 3 | 3 − 3 | 0/3 |
Notice two different mistakes. The learner selecting A and C misses an available correct answer but protects the two points supported by their response. The learner selecting all six finds every key but also selects every distractor, canceling all three positive points. “I included the correct answers somewhere” is therefore not enough.
However, this table is not evidence that choosing fewer answers is always better. A, C and E earns more than A and C. Deliberately omitting E after recognizing why it applies sacrifices an available point. The useful lesson is select the supported options, not the smallest possible set.
When you review a missed SATA, compare your actual response with a specific alternative. Did removing one unsupported choice improve the score? Did fear make you omit a clearly justified key? Those two patterns need different correction, even if the final practice scores were similar.
6. The Zero Floor: What It Protects and What It Does Not
If your selected distractors outnumber your selected keys, the raw difference is negative. In a simple SATA example with one correct selection and three incorrect selections, 1 − 3 = −2. The final score for that item is zero, not negative two.
This floor stops that item from contributing a negative final item score. It does not restore the point you originally earned for the correct selection. It also does not turn a weak response into a correct answer. Zero is still no credit from that unit.
Do not imagine a running examination “points bank” in which one difficult SATA takes two points away from answers you got right much earlier. Item scoring and the examination’s ability estimation are separate steps. Section 20 explains why a raw classroom-style points total is not the official pass/fail rule.
For an independent matrix scoring unit, apply the floor where the rule specifies. A negative column subtotal should not be carried into another column before the floor is applied. This becomes important when one group is answered well and another contains several unsupported selections.
The floor also does not justify selecting everything. In the example above, a response that had one supported selection ended at zero after extra distractors were added. You may have avoided a negative final score, but you still erased useful credit. Learn to prevent the avoidable error rather than relying on its lower bound.
7. Clinical SATA Walkthrough: Hand Hygiene
Original study question: Which statements describe appropriate hand-hygiene practice during routine patient care? Select all that apply.
- A. Clean hands immediately before touching a patient.
- B. Clean hands immediately after removing gloves.
- C. Clean hands after touching a patient’s surroundings.
- D. Wearing gloves replaces the need for hand hygiene.
- E. Clean hands only when visible dirt is present.
- F. Keep the same gloves on when moving from one patient’s care to another patient’s care.
Teaching key: A, B and C. Maximum: 3 points under plus/minus. The clinical basis is CDC’s hand-hygiene guidance for healthcare workers. This example addresses timing and glove misconceptions; it does not replace the setting’s full infection-prevention procedures.
Suppose you select A, B, C and D. You correctly identify three indications but endorse one unsafe misconception. The arithmetic is 3 − 1 = 2/3. Selecting A and B without C earns 2/3 as well, but the learning needs are different: the first response misunderstands gloves; the second misses a relevant indication.
D is incorrect because gloves do not replace cleaning the hands. E is incorrect because visible dirt is not the only reason to clean them. F is incorrect because gloves must be changed between patients’ care; continuing with the same gloves is not made safe by the fact that gloves are being worn.
If you select all six, three incorrect selections cancel three correct selections: 0/3. If you select only A, you earn 1/3, not full credit for “being careful.”
The debrief should therefore include both score and reasoning. Write which indication you missed, which false statement you accepted, and what you will do differently next time. Review the corresponding infection prevention and isolation guide for the broader clinical context.
8. Do Unselected Options Earn or Lose Points?
In the simple SATA rule used here, an unselected correct option does not earn its available point. An unselected incorrect option does not earn a separate point merely because you rejected it. An omitted key is therefore a missed opportunity, while rejecting a distractor avoids a deduction.
This distinction matters when someone describes a SATA response as “five of six choices correct.” They may mean they made five correct yes/no decisions across all boxes. That description does not necessarily equal five points under the item’s scoring rule. The maximum depends on the keys, not automatically on every available checkbox.
For example, if A, C and E are the three keys and you select A and C, you have earned two points. You correctly leave three distractors unchecked, but those omissions do not add three more points. The missed E does not create a minus point either. The final score remains 2/3.
Keep your study records consistent. Record “2/3 available points,” then describe the omitted key or selected distractor separately. Mixing option-level decision accuracy with earned-credit percentage makes comparisons confusing and can hide an over-selection habit.
When a practice platform displays a score, check its explanation of the denominator. The platform may show a learning metric in addition to an item’s points. Understand what is measured before interpreting an apparent disagreement as a scoring error.
9. Why Unsupported SATA Guessing Can Zero Out Credit
The risk is not that every uncertain thought is automatically wrong. The risk is that an extra selected distractor subtracts from supported correct selections. A vague “this sounds nursing-related” feeling is not enough to justify adding an option.
Use an evidence question for each choice: What stated cue, relevant principle or task instruction makes this option appropriate here? A response can be clinically reasonable in a different setting yet fail to answer this stem. The same is true of an action that would happen later when the question asks about the immediate response.
After identifying two well-supported selections, do not add a third simply because you believe SATA questions must have three correct answers. There is no useful fixed-count strategy for an unrestricted SATA item. Equally, do not stop at two if the remaining options have clear support. The instruction is to select all that apply, not to select a predetermined number.
Consider a practice response with C = 2 and W = 0. Adding an unsupported distractor changes the score from 2 to 1. Adding another changes it to 0. That is how apparently harmless guesses can cancel the credit your knowledge had already earned.
Practical coaching: Do not make blind extra SATA selections just to fill the screen. Read every option, keep supported choices, and reject choices contradicted by the scenario. If uncertainty remains, make a reasoned decision within the available time; do not demand impossible absolute certainty.
This advice is not interchangeable with a Select N or single-response strategy. Those tasks have different response constraints and scoring. Section 14 explains why “leave it blank if unsure” is a poor blanket rule.
10. Confidence Is Not the Same as Correctness
A learner can be confident about an incorrect belief and uncertain about a correct interpretation. Therefore, “select only answers you are confident about” is incomplete unless confidence is tied to evidence. Strong feelings are not an answer key.
During practice, label each selected option with a short reason before looking at the explanation. “The stem asks for a finding of deterioration, and this is a new change” is a useful reason. “It sounds serious” is weaker. You will then be able to see whether your confidence came from the actual case or from a familiar phrase.
After review, separate three patterns: justified correct selections, confidently wrong selections, and correct keys omitted through excessive doubt. The first should be reinforced. The second requires correcting a misconception. The third requires rebuilding trust in accurate reasoning rather than becoming more cautious about everything.
A simple error log can have four columns: option, my reason, the reviewed reason, and next action. For a wrong choice, next action might be “distinguish present symptoms from risk factors.” For an omitted key, it might be “use the stated laboratory result rather than imagining a missing contraindication.”
Do not turn uncertainty into a new ritual, such as rereading a correct option five times until it feels certain. You need a defendable decision and a sustainable pace. Use the active-learning overview to turn rationale review into retrieval practice rather than repeated reassurance seeking.
11. Matrix Multiple Response: Keep the Scoring Units Separate
A matrix multiple-response item can allow several selections within a column or group. In NCSBN’s current explanation, matrix MR columns and MR grouping rows are scored independently; a negative subtotal becomes zero within that unit before the totals are combined.
Consider an original arithmetic exercise with two independently scored columns. Column 1 has three available keys. You select two keys and no distractors, earning 2/3. Column 2 has two available keys. You select one key and two distractors, giving a raw subtotal of −1, which becomes 0/2.
| Unit | Correct selected | Incorrect selected | Raw difference | After the unit’s floor |
|---|---|---|---|---|
| Column 1 | 2 | 0 | 2 | 2 |
| Column 2 | 1 | 2 | −1 | 0 |
| Combined item | — | — | Do not combine raw differences first | 2/5 |
The correct teaching total is 2 + 0 = 2 out of 5. Computing 2 + (−1) = 1 before applying one item-wide floor would incorrectly allow Column 2 to cancel a point from Column 1.
For matrix multiple choice, the structure is different: one response per row with 0/1 scoring. Do not apply this column-based plus/minus example to that format merely because both screens look like tables.
When reviewing a matrix exercise, mark its units directly on your notes. Explain each subtotal, then add the final nonnegative unit scores. This also tells you where your reasoning failed: a single weak column should not be hidden inside a vague “matrix questions are difficult” conclusion.
12. The 0/1 Rule Does Not Mean Every Multi-Part Item Is All-or-Nothing
Under 0/1 scoring, a correct response unit earns one point and an incorrect response unit earns zero. When an item contains several independently scored units, those points accumulate. The name describes the unit’s possible scores, not necessarily the entire item’s possible scores.
For a single-response item, one correct response earns its point and one incorrect response earns none. For a four-row matrix multiple-choice exercise, each row can earn its own point. Three correct rows and one incorrect row therefore earn 3/4, not zero for the whole matrix.
This is one of the most useful corrections to make when reading advice online. Someone may say “0/1 means you must get everything right.” That can describe a one-point item, but it misrepresents a multi-point item containing independent targets. Ask what the unit is before accepting the conclusion.
An incorrect response still matters: it leaves its available point unearned. “No subtraction” does not mean “no consequence.” In a constrained-response task, a wrong choice can also occupy a selection slot that could have been used for a key.
The study goal is to improve the specific units you miss. If you answer four of five targets correctly, review the one incorrect target and its clinical reasoning. Do not discard the parts you understood, and do not let a nearly correct item make you ignore a recurring weakness.
13. Worked 0/1 Examples: Select N and Matrix Multiple Choice
Example A: Select three. An original exercise has five options, and the key is A, C and E. The instruction requires three selections. You choose A, B and E. Two selections match the key; B earns zero. Your score is 2/3. B does not subtract another point from the correct selections.
Compare this with unrestricted SATA using the same response and key. SATA would produce 2 − 1 = 1/3. The letters are identical; the instruction and scoring structure change the calculation. That is why reading the stem is part of scoring literacy.
Example B: One selection in each matrix row. A training exercise asks you to classify four statements into the category named in its key. You answer Rows 1, 2 and 4 correctly, but Row 3 incorrectly.
| Row | Response matches its key? | Points |
|---|---|---|
| 1 | Yes | 1 |
| 2 | Yes | 1 |
| 3 | No | 0 |
| 4 | Yes | 1 |
| Total | Three correct rows | 3/4 |
Do not subtract for Row 3, and do not count each unused column as another scored answer. The row is the unit in this example.
Now consider the review. For Select N, ask why B seemed stronger than C. For the matrix, ask why Row 3 was classified incorrectly. Those questions reveal the reasoning error much more clearly than calling both responses “partially right.”
14. What Should You Do When Select N Requires an Uncertain Choice?
Suppose the stem says “Select three,” but you initially identify only two clear choices. First, confirm the task: findings, actions, priorities and outcomes are not interchangeable categories. Then compare the remaining options against the available cues. Choose the third response that best fits the stated task after eliminating unsupported alternatives.
The subtraction warning for SATA should not make you abandon the required selection count. In Select N, an incorrect choice earns zero rather than a negative point, and the interface restricts how many responses can be selected. There is no advantage in treating the unused required position as protected credit.
This does not justify choosing randomly before reasoning. A wrong option occupies one of the requested places, so you should still discriminate carefully. But once you have considered the evidence within a reasonable time, make the most defensible selection and move on.
The same general distinction applies to a single-response question or an independent drop-down target. A blank required response is not a hidden bonus strategy. Use what you know, compare alternatives, and complete the task.
For practice review, note whether you were uncertain because of a content gap, a difficult comparison or a misunderstood instruction. An instruction error can often be corrected immediately. A content gap needs focused retrieval and explanation. A difficult comparison benefits from writing why the best answer beats the closest distractor.
Coaching reminder: Avoid unsupported extra selections on unrestricted SATA. Complete constrained-response tasks with your best reasoned answers. Those statements work together; they are not contradictory rules.
15. Bowtie Scoring: Five Targets, Not One Linked All-or-Nothing Pair
The current NCSBN scoring FAQ places bowtie items under 0/1 scoring and describes a maximum of five points. The five targets comprise a condition, two actions and two monitoring parameters. Correct action tokens can occupy either action target, and correct monitoring tokens can occupy either monitoring target within their respective groups.
This means you should not import rationale-pair scoring into a bowtie solely because the screen visually connects condition, actions and monitoring. Clinical coherence still matters for solving the question, but the published scoring model is independent-target 0/1 scoring.
Use an arithmetic example rather than a treatment protocol. In a hypothetical bowtie exercise, your condition matches the key, both actions match their keys, one monitoring parameter matches and the other does not. The score is 1 + 1 + 1 + 1 + 0 = 4/5.
If the condition is incorrect while the two actions and two monitoring parameters match the key, the same independent-target teaching calculation is 0 + 1 + 1 + 1 + 1 = 4/5. Do not claim that an incorrect centre automatically erases all four other targets under the published bowtie rule.
During review, however, an incorrect condition deserves attention even if several targets earned points. Ask whether the remaining selections reflected sound reasoning or coincidence. A numeric subtotal does not remove the need to understand the patient’s problem.
Source: NCSBN’s bowtie scoring description. Explore the clinical workflow in the NGN case-study guide.
16. Rationale Scoring: The Relationship Is the Scored Unit
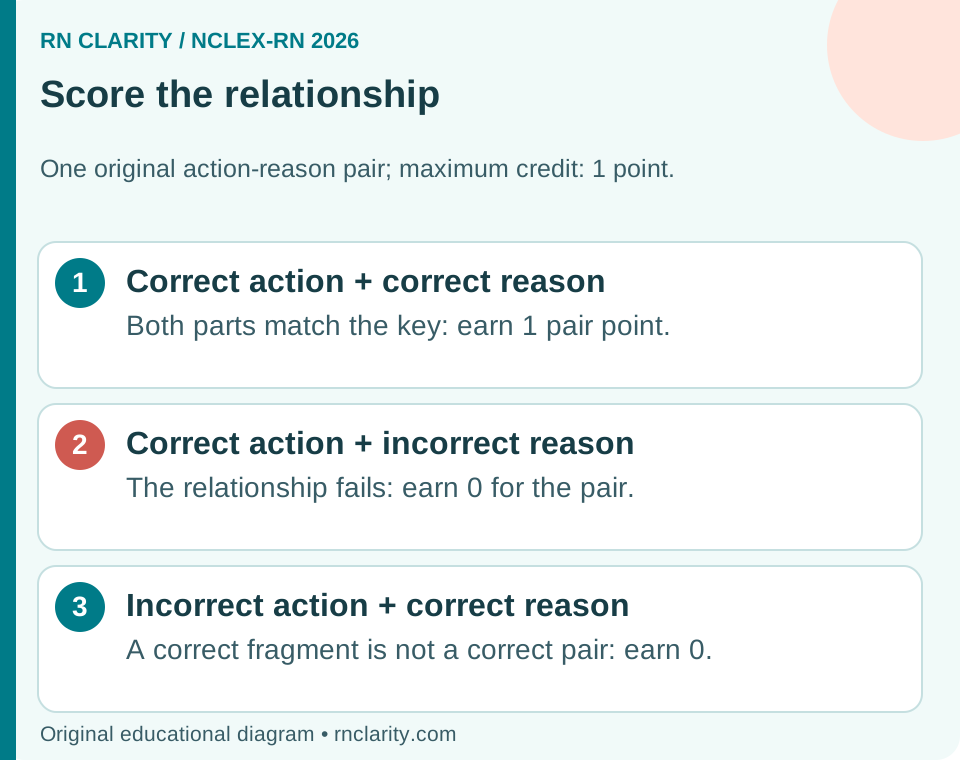
Rationale scoring assesses paired information. The key question is whether two selected parts establish the required relationship. Choosing a correct action with an incorrect reason does not demonstrate that relationship, even though one fragment is right.
For a one-pair teaching example, imagine two targets: an action and the reason that justifies it in the stated scenario. The key identifies one correct action–reason combination. Both selected parts must match that pair to earn its point.
| Action target | Reason target | Credit for the pair |
|---|---|---|
| Correct | Correct | 1 |
| Correct | Incorrect | 0 |
| Incorrect | Correct | 0 |
| Incorrect | Incorrect | 0 |
Do not assign half a point simply because one target is correct. That would replace linked-pair scoring with independent-target scoring. Likewise, do not subtract a point for a broken pair in this example; the pair earns zero.
The reasoning skill matters more than memorizing the table. For each completed sentence, read it as a whole: “This action is appropriate because this evidence supports it.” Does the reason genuinely justify the action? Are you matching the patient’s current situation, or pairing two individually familiar statements?
The current NCSBN scoring FAQ confirms the paired-correctness requirement. “Rationale” here names a scoring relationship; it does not mean that you type a free-text essay explaining your answer.
17. Worked Rationale Example: A Correct Action With the Wrong Reason
Original study exercise: Complete an action–reason pair about hand hygiene after glove removal. The teaching key is: clean the hands after removing gloves because gloves do not replace hand hygiene.
A learner chooses the correct action but selects the reason “hands need cleaning only if visible dirt is present.” The action matches, but the reason is false. The pair therefore earns 0/1. Another learner selects “keep the same gloves for the next patient” while choosing the correct general statement that gloves do not replace hand hygiene. That pair also earns 0/1.
The correct paired response earns 1/1. The clinical principle is supported by CDC’s healthcare-worker guidance; the question and pairing are original teaching material.
This exercise reveals why a rationale item can expose a misconception that a single action selection misses. A person may remember the action from a checklist while holding an inaccurate explanation for it. Correcting the explanation helps the learner transfer the principle to other situations.
When reviewing a broken pair, identify which part failed. Did you choose the wrong intervention? Did you choose an unrelated or false justification? Did you reverse a cause-and-effect relationship? Do not write only “rationale scoring cost me a point.” The rule revealed a reasoning gap that can be addressed.
Practise rebuilding the complete sentence aloud, then explain why the closest distractor does not support it. This is more productive than separately memorizing the action list and the reason list without connecting them.
18. Two Linked Pairs: Avoid Guessing the Denominator From the Screen
Rationale discussions sometimes use “dyad” for two connected elements and “triad” for three. These labels describe a structure, but they should not lead you to assume that every three-target screen is independently worth three points or that every multi-part item is one all-or-nothing block.
For an explicitly defined original teaching exercise, let one concept K link to two supporting findings, F1 and F2. Its key defines two scored pairs: K–F1 and K–F2, each worth one point. This gives a maximum of two points for this exercise, despite three visible targets.
| Selected concept | First finding | Second finding | Teaching pair total |
|---|---|---|---|
| Correct | Correct | Correct | 2/2 |
| Correct | Correct | Incorrect | 1/2 |
| Correct | Incorrect | Incorrect | 0/2 |
| Incorrect | Correct | Correct | 0/2 |
The final row shows dependency: the shared incorrect concept breaks both specified pairs. It is different from the bowtie rule discussed earlier. These are deliberately defined pairs, not a claim that every actual three-blank NCLEX item uses this exact key.
The current scoring FAQ explains paired correctness but does not publish a universal point-count table for every dyad or triad configuration. Where a practice item supplies its scoring explanation, follow that explanation rather than inventing a denominator from the number of menus.
Your preparation task remains the same: connect the concept to the relevant supporting information. Knowing that relationships are assessed should strengthen clinical reasoning, not encourage searching the screen for a hidden points trick.
19. A Six-Item Case Is Not One Giant Rationale Pair
A case study presents an unfolding clinical situation, but its separate items are not all dependent on your first response being correct. NCSBN confirms that case-study items are independent and scored accordingly.
If you feel uncertain about an earlier case item, do not assume the rest of the case has become impossible to score well. Read the currently available information and answer the new task. Within a rationale item, parts may be linked; across the case, individual items are scored separately. Those are different levels of dependency.
Consider an original practice case containing six items with different formats. Item 1 might ask you to recognize relevant cues. A later item might ask you to evaluate changes after an intervention. The later response should be based on the updated case information, not a commitment to defend your initial impression forever.
For study purposes, review each item and then review the clinical story across the case. Item-by-item review identifies scoring mistakes. Whole-case review identifies whether you followed changes, updated hypotheses and evaluated outcomes appropriately. Both are useful, but neither requires assuming one earlier error mathematically erased every later answer.
Candidates cannot return to inspect their previous case responses on the examination. Practise moving forward rather than mentally replaying the last item while trying to read new information.
Go deeper: Explore the six clinical-judgment steps in the NCLEX Hub case-study overview, then use the NGN case-study guide for broader practice planning.
20. Partial-Credit Points Are Not a Universal Passing Percentage
An item’s point calculation does not tell you whether you passed the NCLEX. The examination uses computerized adaptive testing and a passing standard for estimated nursing ability. A simple total such as “I probably earned 70 percent of the available points” cannot reconstruct that process.
Different administered items provide different measurement information, and you do not receive the examination’s scoring data during testing. You also cannot reliably remember every response and key afterward. Adding remembered SATA selections therefore produces an imagined classroom score, not an official result.
The official CAT explanation describes the pass/fail decision rules. Use it to understand the examination’s measurement approach rather than importing a practice-bank percentage cutoff. RN Clarity practice scores are learning information; this guide does not offer a validated pass probability.
A learner might improve from 1/3 to 3/3 on a particular practice item by correcting over-selection. That is useful evidence of learning on that exercise. It is not evidence that a specific number of improved practice points guarantees a pass on an adaptive licensure examination.
Use percentages to monitor comparable practice over time, with attention to the mix of topics and item formats. Avoid converting one session’s subtotal into a confident prediction about the examination. For the separate question of exam length, read NCLEX stopped at 85: pass or fail?.
21. A Reliable Answering Routine Without Counting Hidden Points
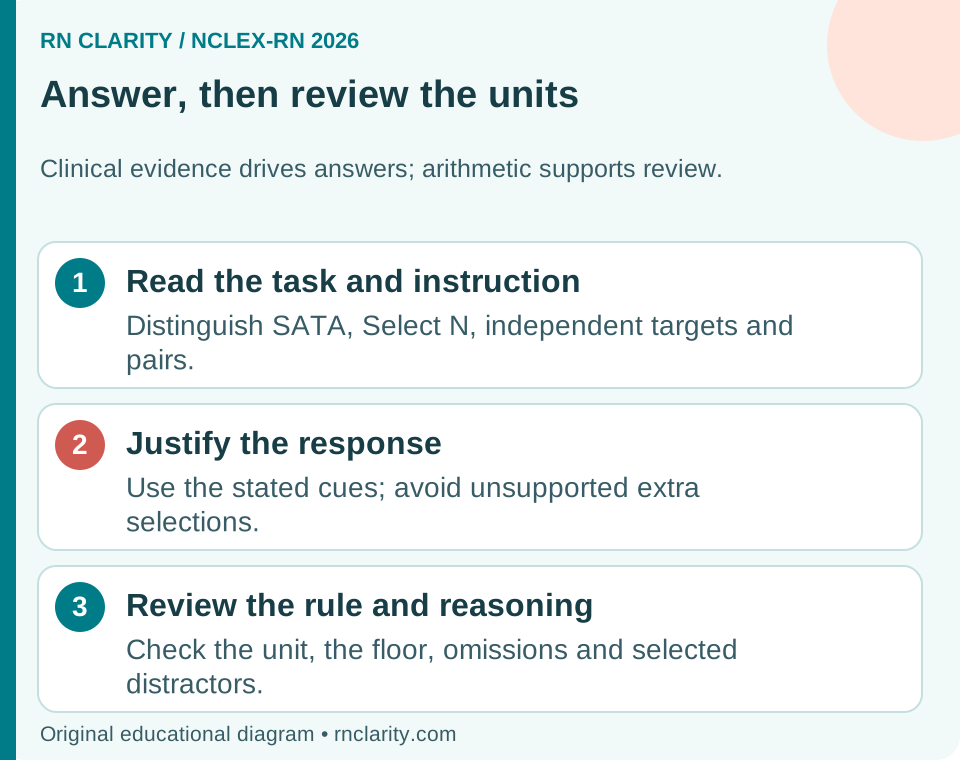
First, identify the task word: recognize, prioritize, select an action, evaluate, or complete a relationship. Next, read the selection instruction. “All that apply,” “select two,” and “one per row” require different response patterns.
Then connect the available information to the task. For each plausible response, name the supporting cue or principle. Reject options that depend on facts the scenario does not provide, contradict an explicit finding, or answer a different question.
Before submitting, perform a brief format check. Have you selected the required number for Select N? Have you completed each required independent target? In SATA, have you added anything merely because it sounded familiar? In a rationale response, does the complete pair make sense?
This check should be short. It is not a second full attempt or a search for mathematical certainty. Changing an answer can be appropriate when you find a real reason, such as a missed instruction or a contradictory cue. Changing it only because anxiety has increased is not new evidence.
After submitting, move forward. A previous response may have been imperfect, but ruminating about its possible point value does not improve the next decision. Maintain the same reading and reasoning routine across formats.
Go deeper: Practise comparing clinical threats in the who does the nurse see first guide, and use the practice-question learning overview to plan focused review.
22. Common Scoring Myths and Better Corrections
| Myth | Better correction |
|---|---|
| Every SATA is all-or-nothing | Current traditional SATA uses plus/minus partial credit |
| Select every plausible option to include the keys | Selected distractors can cancel correct-selection credit |
| Always select only one or two answers | Select supported options; do not invent a fixed SATA count |
| Any wrong response deducts a point | 0/1 incorrect units earn zero; rationale pairs also differ |
| A missed key subtracts another point | In simple SATA, the omitted key earns no point; do not deduct twice |
| Any incorrect bowtie condition zeros the whole item | The published bowtie model has five 0/1 targets |
| A negative matrix column cancels another column | Apply the floor separately to the independent scoring unit |
| One wrong case item ruins the entire case | Separate case-study items are independently scored |
| Partial-credit percentage equals pass probability | Practice credit and official adaptive pass/fail decisions differ |
Use this table during review rather than memorizing it as a substitute for clinical knowledge. For each myth you believed, find one exercise where it changed your response or calculation. Correct the example in your own words.
Traditional SATA coverage is confirmed by NCSBN’s SATA FAQ. The other model distinctions come from its current scoring explanation, while case independence is documented separately.
23. Short Practice Set: Calculate First, Then Explain
These are original scoring exercises with explicit keys, not actual NCLEX questions. Cover the answers and write both the total and one sentence explaining the unit being scored.
Exercise 1: SATA with one distractor
The key is A, C and E. You select A, C, D and E. What is the score?
Answer: 2/3. You selected three keys and one distractor. The calculation is 3 − 1 = 2. The unselected distractors do not earn bonus points.
Exercise 2: SATA below zero
The key is A and D. You select A, B, C and E. What is the score?
Answer: 0/2. One selected key minus three selected distractors produces −2, then the item’s floor gives zero. D is an omitted key, not an additional negative point.
Exercise 3: Select two
The key is B and D. You select B and C under a Select two instruction. What is the score?
Answer: 1/2. B earns one point and C earns zero under 0/1 scoring. You do not subtract C from B.
Exercise 4: Matrix multiple choice
Five rows each have one independently scored response. Your responses match the key in four rows. What is the score?
Answer: 4/5. The four correct rows earn one point each. The incorrect row earns zero; the entire matrix is not zeroed.
Exercise 5: Independent plus/minus columns
Column 1 has two available keys; you select both and no distractors. Column 2 has two available keys; you select one and three distractors. What is the combined score?
Answer: 2/4. Column 1 earns two. Column 2 calculates to −2 and is floored to zero. Add 2 + 0 rather than combining the raw differences.
Exercise 6: A linked pair
Your action matches the key, but its selected justification is incorrect. The teaching exercise has one rationale pair worth one point. What is the score?
Answer: 0/1. The relationship is not correct. One correct fragment does not earn an independent point or a half point for this pair.
Exercise 7: Bowtie targets
Four of five targets match their respective keys under the published bowtie 0/1 model. What is the score?
Answer: 4/5. Each matched target contributes its point. Review the incorrect target’s clinical meaning even when the total is relatively high.
If an answer surprised you, identify whether you misunderstood the rule, the denominator or the floor. Rework that exercise tomorrow without consulting this page, then explain it to another learner using your own numbers.
24. A One-Week Plan for Improving Partial-Credit Performance
Day 1: Learn the units. Complete a small mixed set and label the instruction before responding. During review, identify SATA items, independent targets and linked pairs. Do not compare their percentages without understanding what the denominator represents.
Day 2: Inspect over-selection. Review several SATA responses. For each selected distractor, write why it seemed plausible and which specific cue or principle excludes it. Separate a content misconception from a guess added without evidence.
Day 3: Inspect omissions. Look at unselected keys. Did you miss an important cue, misunderstand the task or doubt correct knowledge? Practise explaining why the key belongs. Being less impulsive should not turn into routinely missing supported answers.
Day 4: Practise constrained formats. Use Select N, matrix multiple choice and independent drop-down exercises. Complete required responses with reasoned choices. Verify that you are not applying a SATA subtraction rule to these units.
Day 5: Build relationships. Review linked rationale examples. Write complete action–reason or concept–evidence sentences, then explain why an incorrect pairing fails.
Day 6: Use an unfolding case. Follow new information without defending an earlier answer automatically. Review each item separately, then summarize the clinical reasoning across the case.
Day 7: Retest the errors. Use comparable new questions and revisit your error log. Look for fewer unsupported additions, fewer omissions of well-supported keys and clearer reasoning. A higher score is useful when you can explain the improvement.
Use RN Clarity’s study-plan overview and the full NCLEX-RN 2026 guide to fit this short review cycle into your broader preparation.
25. Frequently Asked Questions
Does partial credit apply to traditional SATA, or only to NGN case studies?
NCSBN explicitly states that traditional multiple-response SATA uses plus/minus partial credit. It is not limited to SATA inside an unfolding case. Read the item’s instructions and use its response structure rather than assuming that a familiar-looking traditional question is still scored all-or-nothing.
Can one extra wrong SATA answer erase a correct answer’s point?
Yes. In a simple plus/minus item, a selected distractor subtracts one point from the selected-key total. Several extra wrong selections can bring the applicable unit to zero. This is why blind over-selection is risky, even when your response includes some correct options.
Should I choose only options I am completely certain about?
Do not require absolute certainty. Use the available evidence to make supported choices. Avoid blind extra SATA selections, but do not routinely omit justified keys because you feel anxious. Confidence should be checked against your reasoning, and Select N tasks require completing the requested selection count.
Can an item have a negative final score?
For the plus/minus units discussed here, negative totals are floored to zero. The floor is applied to the appropriate item, column or group/row. Do not carry a negative independent unit into another unit before applying its floor.
Is 0/1 scoring the same as all-or-nothing scoring for an entire item?
Not when the item contains multiple independently scored units. Each unit can earn zero or one, and their scores are added. A four-row matrix multiple-choice item with three correct rows earns three of its four available points in the teaching example.
Is bowtie scoring the same as rationale scoring?
No. NCSBN’s current FAQ lists bowtie under 0/1 scoring with five targets. Rationale scoring assesses correctly completed linked pairs. Visual connections on a screen do not justify replacing its published scoring model with a different one.
If I get one case-study item wrong, are later items automatically wrong?
No. NCSBN states that case-study items are independent and scored accordingly. Within one rationale item, responses may be linked, but that does not create one mathematical dependency across the whole case. Read the new information and continue answering the current task.
Can I use my partial-credit percentage to calculate whether I passed?
No. Item points explain responses; official results depend on the adaptive examination’s ability estimate and decision rules. Practice scores can guide learning, but neither remembered response totals nor a practice-bank percentage reconstructs an individual NCLEX result.
26. References and Source Notes
Sources checked October 5, 2026. Current scoring and examination statements rely on the following primary sources; the calculations, practice exercises and study routines are original explanations.
- NCSBN: What are the current scoring models? Updated July 7, 2026; format mappings, independent units, zero floor, bowtie and paired rationale definition.
- NCSBN: Traditional SATA and partial credit Current traditional SATA rule.
- 2026 NCLEX-RN Test Plan Effective April 1, 2026–March 31, 2029; scoring section and examination context.
- NCSBN: Independence of case-study items Distinguishes case progression from response dependency within an item.
- NCLEX: Computerized adaptive testing Examination measurement and pass/fail decision rules.
- CDC: Clinical Safety—Hand Hygiene for Healthcare Workers Clinical basis for the original hand-hygiene exercises.
RN Clarity is not affiliated with or endorsed by NCSBN. These educational examples explain scoring and reasoning; they are not clinical treatment protocols or official examination content.